Introducing the Shell
Overview
Teaching: 5 min
Exercises: 0 minQuestions
What is a command shell and why would I use one?
Objectives
Explain how the shell relates to the keyboard, the screen, the operating system, and users’ programs.
Explain when and why command-line interfaces should be used instead of graphical interfaces.
Background
Humans and computers commonly interact in many different ways, such as through a keyboard and mouse, touch screen interfaces, or using speech recognition systems. The most widely used way to interact with personal computers is called a graphical user interface (GUI). With a GUI, we give instructions by clicking a mouse and using menu-driven interactions.
While the visual aid of a GUI makes it intuitive to learn, this way of delivering instructions to a computer scales very poorly. Imagine the following task: for a literature search, you have to copy the third line of one thousand text files in one thousand different directories and paste it into a single file. Using a GUI, you would not only be clicking at your desk for several hours, but you could potentially also commit an error in the process of completing this repetitive task. This is where we take advantage of the Unix shell. The Unix shell is both a command-line interface (CLI) and a scripting language, allowing such repetitive tasks to be done automatically and fast. With the proper commands, the shell can repeat tasks with or without some modification as many times as we want. Using the shell, the task in the literature example can be accomplished in seconds.
The Shell
The shell is a program where users can type commands. With the shell, it’s possible to invoke complicated programs like climate modeling software or simple commands that create an empty directory with only one line of code. The most popular Unix shell is Bash (the Bourne Again SHell — so-called because it’s derived from a shell written by Stephen Bourne). Bash is the default shell on most modern implementations of Unix and in most packages that provide Unix-like tools for Windows.
Using the shell will take some effort and some time to learn. While a GUI presents you with choices to select, CLI choices are not automatically presented to you, so you must learn a few commands like new vocabulary in a language you’re studying. However, unlike a spoken language, a small number of “words” (i.e. commands) gets you a long way, and we’ll cover those essential few today.
The grammar of a shell allows you to combine existing tools into powerful pipelines and handle large volumes of data automatically. Sequences of commands can be written into a script, improving the reproducibility of workflows.
In addition, the command line is often the easiest way to interact with remote machines and supercomputers. Familiarity with the shell is near essential to run a variety of specialized tools and resources including high-performance computing systems. As clusters and cloud computing systems become more popular for scientific data crunching, being able to interact with the shell is becoming a necessary skill. We can build on the command-line skills covered here to tackle a wide range of scientific questions and computational challenges.
Let’s get started.
When the shell is first opened, you are presented with a prompt, indicating that the shell is waiting for input.
$
The shell typically uses $ as the prompt, but may use a different symbol.
In the examples for this lesson, we’ll show the prompt as $ .
Most importantly:
when typing commands, either from these lessons or from other sources,
do not type the prompt, only the commands that follow it.
Also note that after you type a command, you have to press the Enter key to execute it.
The prompt is followed by a text cursor, a character that indicates the position where your typing will appear. The cursor is usually a flashing or solid block, but it can also be an underscore or a pipe. You may have seen it in a text editor program, for example.
So let’s try our first command, ls which is short for listing.
This command will list the contents of the current directory:
$ ls
Desktop     Downloads   Movies      Pictures
Documents   Library     Music       Public
Command not found
If the shell can’t find a program whose name is the command you typed, it will print an error message such as:
$ ksks: command not foundThis might happen if the command was mis-typed or if the program corresponding to that command is not installed.
Phillipa’s Pipeline: A Typical Problem
Phillipa Frogg, an ecologist, wants to use the Living Planet Index dataset to help her with her research. However, she is unable to use the raw data directly; instead, she has to edit the data so it’s in a suitable format for her to make best use of. Although she could do this by hand in a text editor, this would be laborious, time-consuming, and error-prone. With the shell, Phillipa can instead assign her computer this mundane task while she focuses her attention on writing her latest paper.
The next few lessons will explore the ways Phillipa can achieve this. More specifically, they explain how she can use a command shell to run shell programs, and use loops to automate the repetitive steps of entering file names, so that her computer can work while she writes her paper.
As a bonus, once she has put a processing pipeline together, she will be able to use it again whenever she collects more data.
In order to achieve her task, Phillipa needs to know how to:
- navigate to a file/directory
- create a file/directory
- check the length of a file
- chain commands together
- retrieve a set of files
- iterate over files
- run a shell script containing her pipeline
Key Points
A shell is a program whose primary purpose is to read commands and run other programs.
This lesson uses Bash, the default shell in many implementations of Unix.
Programs can be run in Bash by entering commands at the command-line prompt.
The shell’s main advantages are its high action-to-keystroke ratio, its support for automating repetitive tasks, and its capacity to access networked machines.
The shell’s main disadvantages are its primarily textual nature and how cryptic its commands and operation can be.
Navigating Files and Directories
Overview
Teaching: 30 min
Exercises: 10 minQuestions
How can I move around on my computer?
How can I see what files and directories I have?
How can I specify the location of a file or directory on my computer?
Objectives
Explain the similarities and differences between a file and a directory.
Translate an absolute path into a relative path and vice versa.
Construct absolute and relative paths that identify specific files and directories.
Use options and arguments to change the behaviour of a shell command.
Demonstrate the use of tab completion and explain its advantages.
The part of the operating system responsible for managing files and directories is called the file system. It organizes our data into files, which hold information, and directories (also called ‘folders’), which hold files or other directories.
Several commands are frequently used to create, inspect, rename, and delete files and directories. To start exploring them, we’ll go to our open shell window.
First, let’s find out where we are by running a command called pwd
(which stands for ‘print working directory’). Directories are like places — at any time
while we are using the shell, we are in exactly one place called
our current working directory. Commands mostly read and write files in the
current working directory, i.e. ‘here’, so knowing where you are before running
a command is important. pwd shows you where you are:
$ pwd
/Users/phillipa
Here,
the computer’s response is /Users/phillipa,
which is Phillipa’s home directory:
Home Directory Variation
The home directory path will look different on different operating systems. On Linux, it may look like
/home/phillipa, and on Windows, it will be similar toC:\Documents and Settings\phillipaorC:\Users\phillipa. (Note that it may look slightly different for different versions of Windows.) In future examples, we’ve used Mac output as the default - Linux and Windows output may differ slightly but should be generally similar.We will also assume that your
pwdcommand returns your user’s home directory. Ifpwdreturns something different, you may need to navigate there usingcdor some commands in this lesson will not work as written. See Exploring Other Directories for more details on thecdcommand.
To understand what a ‘home directory’ is, let’s have a look at how the file system as a whole is organized. For the sake of this example, we’ll be illustrating the filesystem on our scientist Phillipa’s computer. After this illustration, you’ll be learning commands to explore your own filesystem, which will be constructed in a similar way, but not be exactly identical.
On Phillipa’s computer, the filesystem looks like this:

At the top is the root directory
that holds everything else.
We refer to it using a slash character, /, on its own;
this character is the leading slash in /Users/phillipa.
Inside that directory are several other directories:
bin (which is where some built-in programs are stored),
data (for miscellaneous data files),
Users (where users’ personal directories are located),
tmp (for temporary files that don’t need to be stored long-term),
and so on.
We know that our current working directory /Users/phillipa is stored inside /Users
because /Users is the first part of its name.
Similarly,
we know that /Users is stored inside the root directory /
because its name begins with /.
Slashes
Notice that there are two meanings for the
/character. When it appears at the front of a file or directory name, it refers to the root directory. When it appears inside a path, it’s just a separator.
Underneath /Users,
we find one directory for each user with an account on Phillipa’s machine,
her colleagues imhotep and larry.

The user imhotep’s files are stored in /Users/imhotep,
user larry’s in /Users/larry,
and Phillipa’s in /Users/phillipa. Phillipa is the user in our
examples here, therefore we get /Users/phillipa as our home directory.
Typically, when you open a new command prompt, you will be in
your home directory to start.
Now let’s learn the command that will let us see the contents of our
own filesystem. We can see what’s in our home directory by running ls:
$ ls
Applications Documents    Library      Music        Public
Desktop      Downloads    Movies       Pictures
(Again, your results may be slightly different depending on your operating system and how you have customized your filesystem.)
ls prints the names of the files and directories in the current directory.
We can make its output more comprehensible by using the -F option
which tells ls to classify the output
by adding a marker to file and directory names to indicate what they are:
- a trailing
/indicates that this is a directory @indicates a link*indicates an executable
Depending on your shell’s default settings, the shell might also use colors to indicate whether each entry is a file or directory.
$ ls -F
Applications/ Documents/    Library/      Music/        Public/
Desktop/      Downloads/    Movies/       Pictures/
Here, we can see that our home directory contains only sub-directories. Any names in our output that don’t have a classification symbol are plain old files.
Clearing your terminal
If your screen gets too cluttered, you can clear your terminal using the
clearcommand. You can still access previous commands using ↑ and ↓ to move line-by-line, or by scrolling in your terminal.
Getting help
ls has lots of other options. There are two common ways to find out how
to use a command and what options it accepts —
depending on your environment, you might find that only one of these ways works:
- We can pass a
--helpoption to the command (available on Linux and Git Bash), such as:$ ls --help - We can read its manual with
man(available on Linux and macOS), such as:$ man ls
We’ll describe both ways next.
The --help option
Most bash commands and programs that people have written to be
run from within bash, support a --help option that displays more
information on how to use the command or program.
$ ls --help
Usage: ls [OPTION]... [FILE]...
List information about the FILEs (the current directory by default).
Sort entries alphabetically if neither -cftuvSUX nor --sort is specified.

Mandatory arguments to long options are mandatory for short options, too.
  -a, --all                  do not ignore entries starting with .
  -A, --almost-all           do not list implied . and ..
      --author               with -l, print the author of each file
  -b, --escape               print C-style escapes for nongraphic characters
      --block-size=SIZE      scale sizes by SIZE before printing them; e.g.,
                               '--block-size=M' prints sizes in units of
                               1,048,576 bytes; see SIZE format below
  -B, --ignore-backups       do not list implied entries ending with ~
  -c                         with -lt: sort by, and show, ctime (time of last
                               modification of file status information);
                               with -l: show ctime and sort by name;
                               otherwise: sort by ctime, newest first
  -C                         list entries by columns
      --color[=WHEN]         colorize the output; WHEN can be 'always' (default
                               if omitted), 'auto', or 'never'; more info below
  -d, --directory            list directories themselves, not their contents
  -D, --dired                generate output designed for Emacs' dired mode
  -f                         do not sort, enable -aU, disable -ls --color
  -F, --classify             append indicator (one of */=>@|) to entries
...        ...        ...
Unsupported command-line options
If you try to use an option that is not supported,
lsand other commands will usually print an error message similar to:$ ls -jls: invalid option -- 'j' Try 'ls --help' for more information.
The man command
The other way to learn about ls is to type
$ man ls
This command will turn your terminal into a page with a description
of the ls command and its options.
To navigate through the man pages,
you may use ↑ and ↓ to move line-by-line,
or try B and Spacebar to skip up and down by a full page.
To search for a character or word in the man pages,
use / followed by the character or word you are searching for.
Sometimes a search will result in multiple hits.
If so, you can move between hits using N (for moving forward) and
Shift+N (for moving backward).
To quit the man pages, press Q.
Manual pages on the web
Of course, there is a third way to access help for commands: searching the internet via your web browser. When using internet search, including the phrase
unix man pagein your search query will help to find relevant results.GNU provides links to its manuals including the core GNU utilities, which covers many commands introduced within this lesson.
Exploring More
lsFlagsYou can also use two options at the same time. What does the command
lsdo when used with the-loption? What about if you use both the-land the-hoption?Some of its output is about properties that we do not cover in this lesson (such as file permissions and ownership), but the rest should be useful nevertheless.
Solution
The
-loption makeslsuse a long listing format, showing not only the file/directory names but also additional information, such as the file size and the time of its last modification. If you use both the-hoption and the-loption, this makes the file size ‘human readable’, i.e. displaying something like5.3Kinstead of5369.
Listing in Reverse Chronological Order
By default,
lslists the contents of a directory in alphabetical order by name. The commandls -tlists items by time of last change instead of alphabetically. The commandls -rlists the contents of a directory in reverse order. Which file is displayed last when you combine the-tand-roptions? Hint: You may need to use the-loption to see the last changed dates.Solution
The most recently changed file is listed last when using
-rt. This can be very useful for finding your most recent edits or checking to see if a new output file was written.
Exploring Other Directories
Not only can we use ls on the current working directory,
but we can use it to list the contents of a different directory.
Let’s take a look at our Desktop directory by running ls -F Desktop,
i.e.,
the command ls with the -F option and the argument Desktop.
The argument Desktop tells ls that
we want a listing of something other than our current working directory:
$ ls -F Desktop
shell-lesson-data/
Note that if a directory named Desktop does not exist in your current working directory,
this command will return an error. Typically, a Desktop directory exists in your
home directory, which we assume is the current working directory of your bash shell.
Your output should be a list of all the files and sub-directories in your
Desktop directory, including the shell-lesson-data directory you downloaded at
the setup for this lesson.
On many systems,
the command line Desktop directory is the same as your GUI Desktop.
Take a look at your Desktop to confirm that your output is accurate.
As you may now see, using a bash shell is strongly dependent on the idea that your files are organized in a hierarchical file system. Organizing things hierarchically in this way helps us keep track of our work: it’s possible to put hundreds of files in our home directory, just as it’s possible to pile hundreds of printed papers on our desk, but it’s a self-defeating strategy.
Now that we know the shell-lesson-data directory is located in our Desktop directory, we
can do two things.
First, we can look at its contents, using the same strategy as before, passing
a directory name to ls:
$ ls -F Desktop/shell-lesson-data
exercise-data/ north-pacific-gyre/
Second, we can actually change our location to a different directory, so we are no longer located in our home directory.
The command to change locations is cd followed by a
directory name to change our working directory.
cd stands for ‘change directory’,
which is a bit misleading:
the command doesn’t change the directory;
it changes the shell’s current working directory.
In other words it changes the shell’s idea of what directory we are in.
The cd command is akin to double-clicking a folder in a graphical interface to get into a folder.
Let’s say we want to move to the data directory we saw above. We can
use the following series of commands to get there:
$ cd Desktop
$ cd shell-lesson-data
$ cd exercise-data
These commands will move us from our home directory into our Desktop directory, then into
the shell-lesson-data directory, then into the exercise-data directory.
You will notice that cd doesn’t print anything. This is normal.
Many shell commands will not output anything to the screen when successfully executed.
But if we run pwd after it, we can see that we are now
in /Users/phillipa/Desktop/shell-lesson-data/exercise-data.
If we run ls -F without arguments now,
it lists the contents of /Users/phillipa/Desktop/shell-lesson-data/exercise-data,
because that’s where we now are:
$ pwd
/Users/phillipa/Desktop/shell-lesson-data/exercise-data
$ ls -F
numbers.txt populations/ writing/
We now know how to go down the directory tree (i.e. how to go into a subdirectory), but how do we go up (i.e. how do we leave a directory and go into its parent directory)? We might try the following:
$ cd shell-lesson-data
-bash: cd: shell-lesson-data: No such file or directory
But we get an error! Why is this?
With our methods so far,
cd can only see sub-directories inside your current directory. There are
different ways to see directories above your current location; we’ll start
with the simplest.
There is a shortcut in the shell to move up one directory level that looks like this:
$ cd ..
.. is a special directory name meaning
“the directory containing this one”,
or more succinctly,
the parent of the current directory.
Sure enough,
if we run pwd after running cd .., we’re back in /Users/phillipa/Desktop/shell-lesson-data:
$ pwd
/Users/phillipa/Desktop/shell-lesson-data
The special directory .. doesn’t usually show up when we run ls. If we want
to display it, we can add the -a option to ls -F:
$ ls -F -a
./ ../ exercise-data/ north-pacific-gyre/
-a stands for ‘show all’ (including hidden files);
it forces ls to show us file and directory names that begin with .,
such as .. (which, if we’re in /Users/phillipa, refers to the /Users directory).
As you can see,
it also displays another special directory that’s just called .,
which means ‘the current working directory’.
It may seem redundant to have a name for it,
but we’ll see some uses for it soon.
Note that in most command line tools, multiple options can be combined
with a single - and no spaces between the options: ls -F -a is
equivalent to ls -Fa.
Other Hidden Files
In addition to the hidden directories
..and., you may also see a file called.bash_profile. This file usually contains shell configuration settings. You may also see other files and directories beginning with.. These are usually files and directories that are used to configure different programs on your computer. The prefix.is used to prevent these configuration files from cluttering the terminal when a standardlscommand is used.
These three commands are the basic commands for navigating the filesystem on your computer:
pwd, ls, and cd. Let’s explore some variations on those commands. What happens
if you type cd on its own, without giving
a directory?
$ cd
How can you check what happened? pwd gives us the answer!
$ pwd
/Users/phillipa
It turns out that cd without an argument will return you to your home directory,
which is great if you’ve got lost in your own filesystem.
Let’s try returning to the exercise-data directory from before. Last time, we used
three commands, but we can actually string together the list of directories
to move to exercise-data in one step:
$ cd Desktop/shell-lesson-data/exercise-data
Check that we’ve moved to the right place by running pwd and ls -F.
If we want to move up one level from the data directory, we could use cd ... But
there is another way to move to any directory, regardless of your
current location.
So far, when specifying directory names, or even a directory path (as above),
we have been using relative paths. When you use a relative path with a command
like ls or cd, it tries to find that location from where we are,
rather than from the root of the file system.
However, it is possible to specify the absolute path to a directory by
including its entire path from the root directory, which is indicated by a
leading slash. The leading / tells the computer to follow the path from
the root of the file system, so it always refers to exactly one directory,
no matter where we are when we run the command.
This allows us to move to our shell-lesson-data directory from anywhere on
the filesystem (including from inside exercise-data). To find the absolute path
we’re looking for, we can use pwd and then extract the piece we need
to move to shell-lesson-data.
$ pwd
/Users/phillipa/Desktop/shell-lesson-data/exercise-data
$ cd /Users/phillipa/Desktop/shell-lesson-data
Run pwd and ls -F to ensure that we’re in the directory we expect.
Two More Shortcuts
The shell interprets a tilde (
~) character at the start of a path to mean “the current user’s home directory”. For example, if Phillipa’s home directory is/Users/phillipa, then~/datais equivalent to/Users/phillipa/data. This only works if it is the first character in the path:here/there/~/elsewhereis nothere/there/Users/phillipa/elsewhere.Another shortcut is the
-(dash) character.cdwill translate-into the previous directory I was in, which is faster than having to remember, then type, the full path. This is a very efficient way of moving back and forth between two directories – i.e. if you executecd -twice, you end up back in the starting directory.The difference between
cd ..andcd -is that the former brings you up, while the latter brings you back.
Try it! First navigate to
~/Desktop/shell-lesson-data(you should already be there).$ cd ~/Desktop/shell-lesson-dataThen
cdinto theexercise-data/populationsdirectory$ cd exercise-data/populationsNow if you run
$ cd -you’ll see you’re back in
~/Desktop/shell-lesson-data. Runcd -again and you’re back in~/Desktop/shell-lesson-data/exercise-data/populations
Absolute vs Relative Paths
Starting from
/Users/amanda/data, which of the following commands could Amanda use to navigate to her home directory, which is/Users/amanda?
cd .cd /cd /home/amandacd ../..cd ~cd homecd ~/data/..cdcd ..Solution
- No:
.stands for the current directory.- No:
/stands for the root directory.- No: Amanda’s home directory is
/Users/amanda.- No: this command goes up two levels, i.e. ends in
/Users.- Yes:
~stands for the user’s home directory, in this case/Users/amanda.- No: this command would navigate into a directory
homein the current directory if it exists.- Yes: unnecessarily complicated, but correct.
- Yes: shortcut to go back to the user’s home directory.
- Yes: goes up one level.
Relative Path Resolution
Using the filesystem diagram below, if
pwddisplays/Users/thing, what willls -F ../backupdisplay?
../backup: No such file or directory2012-12-01 2013-01-08 2013-01-272012-12-01/ 2013-01-08/ 2013-01-27/original/ pnas_final/ pnas_sub/
Solution
- No: there is a directory
backupin/Users.- No: this is the content of
Users/thing/backup, but with.., we asked for one level further up.- No: see previous explanation.
- Yes:
../backup/refers to/Users/backup/.

lsReading ComprehensionUsing the filesystem diagram below, if
pwddisplays/Users/backup, and-rtellslsto display things in reverse order, what command(s) will result in the following output:pnas_sub/ pnas_final/ original/
ls pwdls -r -Fls -r -F /Users/backupSolution
- No:
pwdis not the name of a directory.- Yes:
lswithout directory argument lists files and directories in the current directory.- Yes: uses the absolute path explicitly.
General Syntax of a Shell Command
We have now encountered commands, options, and arguments, but it is perhaps useful to formalise some terminology.
Consider the command below as a general example of a command, which we will dissect into its component parts:
$ ls -F /

ls is the command, with an option -F and an
argument /.
We’ve already encountered options which
either start with a single dash (-) or two dashes (--),
and they change the behavior of a command.
Arguments tell the command what to operate on (e.g. files and directories).
Sometimes options and arguments are referred to as parameters.
A command can be called with more than one option and more than one argument, but a
command doesn’t always require an argument or an option.
You might sometimes see options being referred to as switches or flags, especially for options that take no argument. In this lesson we will stick with using the term option.
Each part is separated by spaces: if you omit the space
between ls and -F the shell will look for a command called ls-F, which
doesn’t exist. Also, capitalization can be important.
For example, ls -s will display the size of files and directories alongside the names,
while ls -S will sort the files and directories by size, as shown below:
$ cd ~/Desktop/shell-lesson-data
$ ls -s exercise-data
0 numbers.txt 0 populations 0 writing
Note that the sizes returned by ls -s are in blocks, and clearly include some rounding.
As these are defined differently for different operating systems,
you may not obtain the same figures as in the example.
$ ls -S exercise-data
populations writing numbers.txt
Putting all that together, our command above gives us a listing
of files and directories in the root directory /.
An example of the output you might get from the above command is given below:
$ ls -F /
Applications/         System/
Library/              Users/
Network/              Volumes/
Phillipa’s Pipeline: Organizing Files
Knowing this much about files and directories, Phillipa is ready to organize the files the files for her research.
She creates a directory called populations
(to remind herself where the data came from),
which will contain the data files from the downloaded dataset,
and her data processing scripts.
In the directory shell-lesson-data/exercise-data,
Phillipa can see what files she has using the command:
$ ls populations
This command is a lot to type, but she can let the shell do most of the work through what is called tab completion. If she types:
$ ls po
and then presses Tab (the tab key on her keyboard), the shell automatically completes the directory name for her:
$ ls populations/
Pressing Tab again does nothing, since there are multiple possibilities; pressing Tab twice brings up a list of all the files.
If Phillipa adds s and presses Tab again, the shell will list all the matches:
$ ls populations/s
To see all of those files, she can press Tab once more.
ls populations/s
shark.txt   six-species.csv
This is called tab completion, and we will see it in many other tools as we go on.
Key Points
The file system is responsible for managing information on the disk.
Information is stored in files, which are stored in directories (folders).
Directories can also store other directories, which then form a directory tree.
pwdprints the user’s current working directory.
ls [path]prints a listing of a specific file or directory;lson its own lists the current working directory.
cd [path]changes the current working directory.Most commands take options that begin with a single
-.Directory names in a path are separated with
/on Unix, but\on Windows.
/on its own is the root directory of the whole file system.An absolute path specifies a location from the root of the file system.
A relative path specifies a location starting from the current location.
.on its own means ‘the current directory’;..means ‘the directory above the current one’.
Working With Files and Directories
Overview
Teaching: 30 min
Exercises: 20 minQuestions
How can I create, copy, and delete files and directories?
How can I edit files?
Objectives
Create a directory hierarchy that matches a given diagram.
Create files in that hierarchy using an editor or by copying and renaming existing files.
Delete, copy and move specified files and/or directories.
Creating directories
We now know how to explore files and directories, but how do we create them in the first place?
In this episode we will learn about creating and moving files and directories,
using the exercise-data/writing directory as an example.
Step one: see where we are and what we already have
We should still be in the shell-lesson-data directory on the Desktop,
which we can check using:
$ pwd
/Users/phillipa/Desktop/shell-lesson-data
Next we’ll move to the exercise-data/writing directory and see what it contains:
$ cd exercise-data/writing/
$ ls -F
haiku.txt LittleWomen.txt
Create a directory
Let’s create a new directory called thesis using the command mkdir thesis
(which has no output):
$ mkdir thesis
As you might guess from its name,
mkdir means ‘make directory’.
Since thesis is a relative path
(i.e., does not have a leading slash, like /what/ever/thesis),
the new directory is created in the current working directory:
$ ls -F
haiku.txt LittleWomen.txt thesis/
Since we’ve just created the thesis directory, there’s nothing in it yet:
$ ls -F thesis
Note that mkdir is not limited to creating single directories one at a time.
The -p option allows mkdir to create a directory with nested subdirectories
in a single operation:
$ mkdir -p ../project/data ../project/results
The -R option to the ls command will list all nested subdirectories within a directory.
Let’s use ls -FR to recursively list the new directory hierarchy we just created in the
project directory:
$ ls -FR ../project
../project/:
data/  results/

../project/data:

../project/results:
Two ways of doing the same thing
Using the shell to create a directory is no different than using a file explorer. If you open the current directory using your operating system’s graphical file explorer, the
thesisdirectory will appear there too. While the shell and the file explorer are two different ways of interacting with the files, the files and directories themselves are the same.
Good names for files and directories
Complicated names of files and directories can make your life painful when working on the command line. Here we provide a few useful tips for the names of your files and directories.
Don’t use spaces.
Spaces can make a name more meaningful, but since spaces are used to separate arguments on the command line it is better to avoid them in names of files and directories. You can use
-or_instead (e.g. you might usepopulation-data/rather thanpopulation data/). To test this out, try typingmkdir population dataand see what directory (or directories!) are made when you check withls -F.Don’t begin the name with
-(dash).Commands treat names starting with
-as options.Stick with letters, numbers,
.(period or ‘full stop’),-(dash) and_(underscore).Many other characters have special meanings on the command line. We will learn about some of these during this lesson. There are special characters that can cause your command to not work as expected and can even result in data loss.
If you need to refer to names of files or directories that have spaces or other special characters, you should surround the name in quotes (
"").
Create a text file
Let’s change our working directory to thesis using cd,
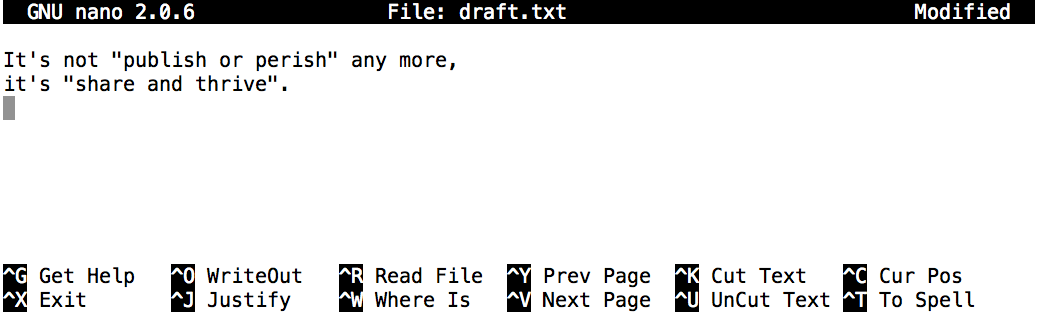
then run a text editor called Nano to create a file called draft.txt:
$ cd thesis
$ nano draft.txt
Which Editor?
When we say, ‘
nanois a text editor’ we really do mean ‘text’: it can only work with plain character data, not tables, images, or any other human-friendly media. We use it in examples because it is one of the least complex text editors. However, because of this trait, it may not be powerful enough or flexible enough for the work you need to do after this workshop. On Unix systems (such as Linux and macOS), many programmers use Emacs or Vim (both of which require more time to learn), or a graphical editor such as Gedit. On Windows, you may wish to use Notepad++. Windows also has a built-in editor callednotepadthat can be run from the command line in the same way asnanofor the purposes of this lesson.No matter what editor you use, you will need to know where it searches for and saves files. If you start it from the shell, it will (probably) use your current working directory as its default location. If you use your computer’s start menu, it may want to save files in your desktop or documents directory instead. You can change this by navigating to another directory the first time you ‘Save As…’
Let’s type in a few lines of text.
Once we’re happy with our text, we can press Ctrl+O
(press the Ctrl or Control key and, while
holding it down, press the O key) to write our data to disk
(we’ll be asked what file we want to save this to:
press Return to accept the suggested default of draft.txt).
Once our file is saved, we can use Ctrl+X to quit the editor and return to the shell.
Control, Ctrl, or ^ Key
The Control key is also called the ‘Ctrl’ key. There are various ways in which using the Control key may be described. For example, you may see an instruction to press the Control key and, while holding it down, press the X key, described as any of:
Control-XControl+XCtrl-XCtrl+X^XC-xIn nano, along the bottom of the screen you’ll see
^G Get Help ^O WriteOut. This means that you can useControl-Gto get help andControl-Oto save your file.
nano doesn’t leave any output on the screen after it exits,
but ls now shows that we have created a file called draft.txt:
$ ls
draft.txt
Creating Files a Different Way
We have seen how to create text files using the
nanoeditor. Now, try the following command:$ touch my_file.txt
What did the
touchcommand do? When you look at your current directory using the GUI file explorer, does the file show up?Use
ls -lto inspect the files. How large ismy_file.txt?When might you want to create a file this way?
Solution
The
touchcommand generates a new file calledmy_file.txtin your current directory. You can observe this newly generated file by typinglsat the command line prompt.my_file.txtcan also be viewed in your GUI file explorer.When you inspect the file with
ls -l, note that the size ofmy_file.txtis 0 bytes. In other words, it contains no data. If you openmy_file.txtusing your text editor it is blank.Some programs do not generate output files themselves, but instead require that empty files have already been generated. When the program is run, it searches for an existing file to populate with its output. The touch command allows you to efficiently generate a blank text file to be used by such programs.
To avoid confusion later on, we suggest removing the file you’ve just created before proceeding with the rest of the episode, otherwise future outputs may vary from those given in the lesson. To do this, use the following command:
$ rm my_file.txt
What’s In A Name?
You may have noticed that all of Phillipa’s files are named ‘something dot something’, and in this part of the lesson, we always used the extension
.txt. This is just a convention: we can call a filemythesisor almost anything else we want. However, most people use two-part names most of the time to help them (and their programs) tell different kinds of files apart. The second part of such a name is called the filename extension and indicates what type of data the file holds:.txtsignals a plain text file,.cfgis a configuration file full of parameters for some program or other,.pngis a PNG image, and so on.This is just a convention, albeit an important one. Files contain bytes: it’s up to us and our programs to interpret those bytes according to the rules for plain text files, PDF documents, configuration files, images, and so on.
Naming a PNG image of a whale as
whale.mp3doesn’t somehow magically turn it into a recording of whale song, though it might cause the operating system to try to open it with a music player when someone double-clicks it.
Moving files and directories
Returning to the shell-lesson-data/exercise-data/writing directory,
$ cd ~/Desktop/shell-lesson-data/exercise-data/writing
In our thesis directory we have a file draft.txt
which isn’t a particularly informative name,
so let’s change the file’s name using mv,
which is short for ‘move’:
$ mv thesis/draft.txt thesis/quotes.txt
The first argument tells mv what we’re ‘moving’,
while the second is where it’s to go.
In this case,
we’re moving thesis/draft.txt to thesis/quotes.txt,
which has the same effect as renaming the file.
Sure enough,
ls shows us that thesis now contains one file called quotes.txt:
$ ls thesis
quotes.txt
One must be careful when specifying the target file name, since mv will
silently overwrite any existing file with the same name, which could
lead to data loss. An additional option, mv -i (or mv --interactive),
can be used to make mv ask you for confirmation before overwriting.
Note that mv also works on directories.
Let’s move quotes.txt into the current working directory.
We use mv once again,
but this time we’ll use just the name of a directory as the second argument
to tell mv that we want to keep the filename
but put the file somewhere new.
(This is why the command is called ‘move’.)
In this case,
the directory name we use is the special directory name . that we mentioned earlier.
$ mv thesis/quotes.txt .
The effect is to move the file from the directory it was in to the current working directory.
ls now shows us that thesis is empty:
$ ls thesis
$
Alternatively, we can confirm the file quotes.txt is no longer present in the thesis directory
by explicitly trying to list it:
$ ls thesis/quotes.txt
ls: cannot access 'thesis/quotes.txt': No such file or directory
ls with a filename or directory as an argument only lists the requested file or directory.
If the file given as the argument doesn’t exist, the shell returns an error as we saw above.
We can use this to see that quotes.txt is now present in our current directory:
$ ls quotes.txt
quotes.txt
Moving Files to a new folder
After running the following commands, Jamie realizes that she put the files
sucrose.datandmaltose.datinto the wrong folder. The files should have been placed in therawfolder.$ ls -F analyzed/ raw/ $ ls -F analyzed fructose.dat glucose.dat maltose.dat sucrose.dat $ cd analyzedFill in the blanks to move these files to the
raw/folder (i.e. the one she forgot to put them in)$ mv sucrose.dat maltose.dat ____/____Solution
$ mv sucrose.dat maltose.dat ../rawRecall that
..refers to the parent directory (i.e. one above the current directory) and that.refers to the current directory.
Copying files and directories
The cp command works very much like mv,
except it copies a file instead of moving it.
We can check that it did the right thing using ls
with two paths as arguments — like most Unix commands,
ls can be given multiple paths at once:
$ cp quotes.txt thesis/quotations.txt
$ ls quotes.txt thesis/quotations.txt
quotes.txt thesis/quotations.txt
We can also copy a directory and all its contents by using the
recursive option -r,
e.g. to back up a directory:
$ cp -r thesis thesis_backup
We can check the result by listing the contents of both the thesis and thesis_backup directory:
$ ls thesis thesis_backup
thesis:
quotations.txt

thesis_backup:
quotations.txt
Renaming Files
Suppose that you created a plain-text file in your current directory to contain a list of the statistical tests you will need to do to analyze your data, and named it:
statstics.txtAfter creating and saving this file you realize you misspelled the filename! You want to correct the mistake, which of the following commands could you use to do so?
cp statstics.txt statistics.txtmv statstics.txt statistics.txtmv statstics.txt .cp statstics.txt .Solution
- No. While this would create a file with the correct name, the incorrectly named file still exists in the directory and would need to be deleted.
- Yes, this would work to rename the file.
- No, the period(.) indicates where to move the file, but does not provide a new file name; identical file names cannot be created.
- No, the period(.) indicates where to copy the file, but does not provide a new file name; identical file names cannot be created.
Moving and Copying
What is the output of the closing
lscommand in the sequence shown below?$ pwd/Users/jamie/data$ lsproteins.dat$ mkdir recombined $ mv proteins.dat recombined/ $ cp recombined/proteins.dat ../proteins-saved.dat $ ls
proteins-saved.dat recombinedrecombinedproteins.dat recombinedproteins-saved.datSolution
We start in the
/Users/jamie/datadirectory, and create a new folder calledrecombined. The second line moves (mv) the fileproteins.datto the new folder (recombined). The third line makes a copy of the file we just moved. The tricky part here is where the file was copied to. Recall that..means ‘go up a level’, so the copied file is now in/Users/jamie. Notice that..is interpreted with respect to the current working directory, not with respect to the location of the file being copied. So, the only thing that will show using ls (in/Users/jamie/data) is the recombined folder.
- No, see explanation above.
proteins-saved.datis located at/Users/jamie- Yes
- No, see explanation above.
proteins.datis located at/Users/jamie/data/recombined- No, see explanation above.
proteins-saved.datis located at/Users/jamie
Removing files and directories
Returning to the shell-lesson-data/exercise-data/writing directory,
let’s tidy up this directory by removing the quotes.txt file we created.
The Unix command we’ll use for this is rm (short for ‘remove’):
$ rm quotes.txt
We can confirm the file has gone using ls:
$ ls quotes.txt
ls: cannot access 'quotes.txt': No such file or directory
Deleting Is Forever
The Unix shell doesn’t have a trash bin that we can recover deleted files from (though most graphical interfaces to Unix do). Instead, when we delete files, they are unlinked from the file system so that their storage space on disk can be recycled. Tools for finding and recovering deleted files do exist, but there’s no guarantee they’ll work in any particular situation, since the computer may recycle the file’s disk space right away.
Using
rmSafelyWhat happens when we execute
rm -i thesis_backup/quotations.txt? Why would we want this protection when usingrm?Solution
rm: remove regular file 'thesis_backup/quotations.txt'? yThe
-ioption will prompt before (every) removal (use Y to confirm deletion or N to keep the file). The Unix shell doesn’t have a trash bin, so all the files removed will disappear forever. By using the-ioption, we have the chance to check that we are deleting only the files that we want to remove.
If we try to remove the thesis directory using rm thesis,
we get an error message:
$ rm thesis
rm: cannot remove `thesis': Is a directory
This happens because rm by default only works on files, not directories.
rm can remove a directory and all its contents if we use the
recursive option -r, and it will do so without any confirmation prompts:
$ rm -r thesis
Given that there is no way to retrieve files deleted using the shell,
rm -r should be used with great caution
(you might consider adding the interactive option rm -r -i).
Operations with multiple files and directories
Oftentimes one needs to copy or move several files at once. This can be done by providing a list of individual filenames, or specifying a naming pattern using wildcards.
Copy with Multiple Filenames
For this exercise, you can test the commands in the
shell-lesson-data/exercise-datadirectory.In the example below, what does
cpdo when given several filenames and a directory name?$ mkdir backup $ cp populations/six-species.csv populations/dunnock.txt backup/In the example below, what does
cpdo when given three or more file names?$ cd populations $ ls -Fbowerbird.txt dunnock.txt python.txt script.txt shark.txt six-species.csv toad.txt wildcat.txt$ cp bowerbird.txt dunnock.txt python.txtSolution
If given more than one file name followed by a directory name (i.e. the destination directory must be the last argument),
cpcopies the files to the named directory.If given three file names,
cpthrows an error such as the one below, because it is expecting a directory name as the last argument.cp: target 'python.txt' is not a directory
Using wildcards for accessing multiple files at once
Wildcards
*is a wildcard, which matches zero or more characters. Let’s consider theshell-lesson-data/exercise-data/populationsdirectory:*.txtmatchesbowerbird.txt,dunnock.txt, and every file that ends with ‘.txt’. On the other hand,b*.txtonly matchesbowerbird.txt, because the ‘b’ at the front only matches filenames that begin with the letter ‘b’.
?is also a wildcard, but it matches exactly one character. So?unnock.txtwould matchdunnock.txtwhereas*k.txtmatches bothdunnock.txtandshark.txt.Wildcards can be used in combination with each other e.g.
????k.txtmatches three characters followed byk.txt, givingshark.txt.When the shell sees a wildcard, it expands the wildcard to create a list of matching filenames before running the command that was asked for. As an exception, if a wildcard expression does not match any file, Bash will pass the expression as an argument to the command as it is. For example, typing
ls *.pdfin thepopulationsdirectory (which contains only files with names ending with.txtor.csv) results in an error message that there is no file calledwcandlssee the lists of file names matching these expressions, but not the wildcards themselves. It is the shell, not the other programs, that deals with expanding wildcards.
List filenames matching a pattern
When run in the
populationsdirectory, whichlscommand(s) will produce this output?
dunnock.txt toad.txt
ls *.*ls *o*ls *o??.*ls dunnock?toad.*Solution
The solution is
3.
1.shows all files whose names contain zero or more characters (*) followed by the full stop., then zero or more characters (*). This givesbowerbird.txt dunnock.txt python.txt shark.txt six-species.csv toad.txt wildcat.txt.
2.shows all files whose names start with zero or more characters (*) followed by the lettero, followed by zero or more characters (*). In other words, it shows all files whose names contain the lettero. This gives usbowerbird.txt dunnock.txt python.txt toad.txt.
3.is more specific than option 2 by matching zero or more characters (*), followed by the lettero, followed by any two characters (??), followed by a full stop., followed by zero or more characters (*). This is the solution.
4.only shows files starting withdunnock, followed by any single character (?), followed bytoad., followed by zero or more characters (*). No files in the directory match these criteria.
More on Wildcards
Sam has a directory containing calibration data, datasets, and descriptions of the datasets:
.
├── 2015-10-23-calibration.txt
├── 2015-10-23-dataset1.txt
├── 2015-10-23-dataset2.txt
├── 2015-10-23-dataset_overview.txt
├── 2015-10-26-calibration.txt
├── 2015-10-26-dataset1.txt
├── 2015-10-26-dataset2.txt
├── 2015-10-26-dataset_overview.txt
├── 2015-11-23-calibration.txt
├── 2015-11-23-dataset1.txt
├── 2015-11-23-dataset2.txt
├── 2015-11-23-dataset_overview.txt
├── backup
│   ├── calibration
│   └── datasets
└── send_to_bob
    ├── all_datasets_created_on_a_23rd
    └── all_november_files
Before heading off to another field trip, she wants to back up her data and send some datasets to her colleague Bob. Sam uses the following commands to get the job done:
$ cp *dataset* backup/datasets
$ cp ____calibration____ backup/calibration
$ cp 2015-____-____ send_to_bob/all_november_files/
$ cp ____ send_to_bob/all_datasets_created_on_a_23rd/
Help Sam by filling in the blanks.
The resulting directory structure should look like this
.
├── 2015-10-23-calibration.txt
├── 2015-10-23-dataset1.txt
├── 2015-10-23-dataset2.txt
├── 2015-10-23-dataset_overview.txt
├── 2015-10-26-calibration.txt
├── 2015-10-26-dataset1.txt
├── 2015-10-26-dataset2.txt
├── 2015-10-26-dataset_overview.txt
├── 2015-11-23-calibration.txt
├── 2015-11-23-dataset1.txt
├── 2015-11-23-dataset2.txt
├── 2015-11-23-dataset_overview.txt
├── backup
│   ├── calibration
│   │   ├── 2015-10-23-calibration.txt
│   │   ├── 2015-10-26-calibration.txt
│   │   └── 2015-11-23-calibration.txt
│   └── datasets
│       ├── 2015-10-23-dataset1.txt
│       ├── 2015-10-23-dataset2.txt
│       ├── 2015-10-23-dataset_overview.txt
│       ├── 2015-10-26-dataset1.txt
│       ├── 2015-10-26-dataset2.txt
│       ├── 2015-10-26-dataset_overview.txt
│       ├── 2015-11-23-dataset1.txt
│       ├── 2015-11-23-dataset2.txt
│       └── 2015-11-23-dataset_overview.txt
└── send_to_bob
    ├── all_datasets_created_on_a_23rd
    │   ├── 2015-10-23-dataset1.txt
    │   ├── 2015-10-23-dataset2.txt
    │   ├── 2015-10-23-dataset_overview.txt
    │   ├── 2015-11-23-dataset1.txt
    │   ├── 2015-11-23-dataset2.txt
    │   └── 2015-11-23-dataset_overview.txt
    └── all_november_files
        ├── 2015-11-23-calibration.txt
        ├── 2015-11-23-dataset1.txt
        ├── 2015-11-23-dataset2.txt
        └── 2015-11-23-dataset_overview.txt
Solution
$ cp *calibration.txt backup/calibration
$ cp 2015-11-* send_to_bob/all_november_files/
$ cp *-23-dataset* send_to_bob/all_datasets_created_on_a_23rd/
Organizing Directories and Files
Jamie is working on a project and she sees that her files aren’t very well organized:
$ ls -Fanalyzed/ fructose.dat raw/ sucrose.datThe
fructose.datandsucrose.datfiles contain output from her data analysis. What command(s) covered in this lesson does she need to run so that the commands below will produce the output shown?$ ls -Fanalyzed/ raw/$ ls analyzedfructose.dat sucrose.datSolution
mv *.dat analyzedJamie needs to move her files
fructose.datandsucrose.datto theanalyzeddirectory. The shell will expand *.dat to match all .dat files in the current directory. Themvcommand then moves the list of .dat files to the ‘analyzed’ directory.
Reproduce a folder structure
You’re starting a new experiment and would like to duplicate the directory structure from your previous experiment so you can add new data.
Assume that the previous experiment is in a folder called
2016-05-18, which contains adatafolder that in turn contains folders namedrawandprocessedthat contain data files. The goal is to copy the folder structure of the2016-05-18folder into a folder called2016-05-20so that your final directory structure looks like this:2016-05-20/ └── data ├── processed └── rawWhich of the following set of commands would achieve this objective? What would the other commands do?
$ mkdir 2016-05-20
$ mkdir 2016-05-20/data
$ mkdir 2016-05-20/data/processed
$ mkdir 2016-05-20/data/raw
$ mkdir 2016-05-20 $ cd 2016-05-20 $ mkdir data $ cd data $ mkdir raw processed$ mkdir 2016-05-20/data/raw $ mkdir 2016-05-20/data/processed$ mkdir -p 2016-05-20/data/raw $ mkdir -p 2016-05-20/data/processed$ mkdir 2016-05-20 $ cd 2016-05-20 $ mkdir data $ mkdir raw processedSolution
The first two sets of commands achieve this objective. The first set uses relative paths to create the top-level directory before the subdirectories.
The third set of commands will give an error because the default behavior of
mkdirwon’t create a subdirectory of a non-existent directory: the intermediate level folders must be created first.The fourth set of commands achieve this objective. Remember, the
-poption, followed by a path of one or more directories, will causemkdirto create any intermediate subdirectories as required.The final set of commands generates the ‘raw’ and ‘processed’ directories at the same level as the ‘data’ directory.
Key Points
cp [old] [new]copies a file.
mkdir [path]creates a new directory.
mv [old] [new]moves (renames) a file or directory.
rm [path]removes (deletes) a file.
*matches zero or more characters in a filename, so*.txtmatches all files ending in.txt.
?matches any single character in a filename, so?.txtmatchesa.txtbut notany.txt.Use of the Control key may be described in many ways, including
Ctrl-X,Control-X, and^X.The shell does not have a trash bin: once something is deleted, it’s really gone.
Most files’ names are
something.extension. The extension isn’t required, and doesn’t guarantee anything, but is normally used to indicate the type of data in the file.Depending on the type of work you do, you may need a more powerful text editor than Nano.
Pipes and Filters
Overview
Teaching: 25 min
Exercises: 10 minQuestions
How can I combine existing commands to do new things?
Objectives
Redirect a command’s output to a file.
Construct command pipelines with two or more stages.
Explain what usually happens if a program or pipeline isn’t given any input to process.
Explain the advantage of linking commands with pipes and filters.
Now that we know a few basic commands, we can finally look at the shell’s most powerful feature: the ease with which it lets us combine existing programs in new ways.
We’ll start with the directory shell-lesson-data/exercise-data/populations
that contains data extracted from the 2022 version of the Living Planet Database (LPD). The LPD is kindly provided by Living Planet Index and is
the basis of the Living Planet Report 2022, which has been covered extensively in the media, for example here.
The full LPD contains population time series data for 5268 species and 38427 populations. We have extracted a subset of data for six species and processed it for easier use in this exercise. (The full, original dataset may be downloaded here.)
Following an optional convention, the .txt extension indicates that files are in text format. In the LPD, each line of text gives a time series, showing variation in population size over a range of years, plus associated data such as the species name and literature source. Each of these six files contains all population time series in the LPD for a particular species of animal. (There is one additional file, which we will return to later in this episode.)
$ ls populations
bowerbird.txt dunnock.txt python.txt shark.txt six-species.csv toad.txt wildcat.txt
Let’s go into that directory with cd and run an example command wc wildcat.txt:
$ cd populations
$ wc wildcat.txt
4 408 4142 wildcat.txt
wc is the ‘word count’ command:
it counts the number of lines, words, and characters in files (from left to right, in that order).
If we run the command wc *.txt, the * in *.txt matches zero or more characters,
so the shell turns *.txt into a list of all .txt files in the current directory:
$ wc *.txt
    3   306  2808 bowerbird.txt
   11  1131  9838 dunnock.txt
    1   102   798 python.txt
   18  1841 16908 shark.txt
   20  2049 19034 toad.txt
    4   409  4142 wildcat.txt
   57  5838 53528 total
Note that wc *.txt also shows the total number of all lines in the last line of the output.
If we run wc -l instead of just wc,
the output shows only the number of lines per file:
$ wc -l *.txt
    3 bowerbird.txt
   11 dunnock.txt
    1 python.txt
   18 shark.txt
   20 toad.txt
    4 wildcat.txt
   57 total
The -m and -w options can also be used with the wc command, to show
only the number of characters or the number of words in the files.
Why Isn’t It Doing Anything?
What happens if a command is supposed to process a file, but we don’t give it a filename? For example, what if we type:
$ wc -lbut don’t type
*.txt(or anything else) after the command? Since it doesn’t have any filenames,wcassumes it is supposed to process input given at the command prompt, so it just sits there and waits for us to give it some data interactively. From the outside, though, all we see is it sitting there: the command doesn’t appear to do anything.If you make this kind of mistake, you can escape out of this state by holding down the control key (Ctrl) and typing the letter C once and letting go of the Ctrl key. Ctrl+C
Capturing output from commands
Which of these files contains the fewest lines? It’s an easy question to answer when there are only six files, but what if there were 6000? Our first step toward a solution is to run the command:
$ wc -l *.txt > lengths.txt
The greater than symbol, >, tells the shell to redirect the command’s output
to a file instead of printing it to the screen. (This is why there is no screen output:
everything that wc would have printed has gone into the
file lengths.txt instead.) The shell will create
the file if it doesn’t exist. If the file exists, it will be
silently overwritten, which may lead to data loss and thus requires
some caution.
ls lengths.txt confirms that the file exists:
$ ls lengths.txt
lengths.txt
We can now send the content of lengths.txt to the screen using cat lengths.txt.
The cat command gets its name from ‘concatenate’ i.e. join together,
and it prints the contents of files one after another.
There’s only one file in this case,
so cat just shows us what it contains:
$ cat lengths.txt
    3 bowerbird.txt
   11 dunnock.txt
    1 python.txt
   18 shark.txt
   20 toad.txt
    4 wildcat.txt
   57 total
Output Page by Page
We’ll continue to use
catin this lesson, for convenience and consistency, but it has the disadvantage that it always dumps the whole file onto your screen. More useful in practice is the commandless, which you can use withless lengths.txt. This displays a screenful of the file, and then stops. You can go forward one screenful by pressing the spacebar, or back one by pressingb. Pressqto quit.
Filtering output
Next we’ll use the sort command to sort the contents of the lengths.txt file.
But first we’ll use an exercise to learn a little about the sort command:
What Does
sort -gDo?The file
shell-lesson-data/exercise-data/numbers.txtcontains the following lines:10 2 19 22 6If we run
sorton this file, the output is:10 19 2 22 6If we run
sort -gon the same file, we get this instead:2 6 10 19 22Explain why
-ghas this effect.Solution
The
-goption specifies a sort on numerical value, rather than an alphanumerical sort.
We will also use the -g option to specify that the sort is
numerical instead of alphanumerical.
This does not change the file;
instead, it sends the sorted result to the screen. Make sure you are in the shell-lesson-data/exercise-data/populations directory, and then:
$ sort -g lengths.txt
    1 python.txt
    3 bowerbird.txt
    4 wildcat.txt
   11 dunnock.txt
   18 shark.txt
   20 toad.txt
   57 total
Remember that there is one population time series per line. So this output tells us that the python file contains one population time series, the bowerbird file contains four, and so on.
We can put the sorted list of lines in another temporary file called sorted-lengths.txt
by putting > sorted-lengths.txt after the command,
just as we used > lengths.txt to put the output of wc into lengths.txt.
Once we’ve done that,
we can run another command called head to get the first few lines in sorted-lengths.txt:
$ sort -g lengths.txt > sorted-lengths.txt
$ head -n 1 sorted-lengths.txt
1 python.txt
Using -n 1 with head tells it that
we only want the first line of the file;
-n 20 would get the first 20,
and so on.
Since sorted-lengths.txt contains the lengths of our files ordered from least to greatest,
the output of head must be the file with the fewest lines.
Redirecting to the same file
It’s a very bad idea to try redirecting the output of a command that operates on a file to the same file. For example:
$ sort -g lengths.txt > lengths.txtDoing something like this may give you incorrect results and/or delete the contents of
lengths.txt.
What Does
>>Mean?We have seen the use of
>, but there is a similar operator>>which works slightly differently. We’ll learn about the differences between these two operators by printing some strings. We can use theechocommand to print strings e.g.$ echo The echo command prints textThe echo command prints textNow test the commands below to reveal the difference between the two operators:
$ echo hello > testfile01.txtand:
$ echo hello >> testfile02.txtHint: Try executing each command twice in a row and then examining the output files.
Solution
In the first example with
>, the string ‘hello’ is written totestfile01.txt, but the file gets overwritten each time we run the command.We see from the second example that the
>>operator also writes ‘hello’ to a file (in this casetestfile02.txt), but appends the string to the file if it already exists (i.e. when we run it for the second time).
Appending Data
We have already met the
headcommand, which prints lines from the start of a file.tailis similar, but prints lines from the end of a file instead.Consider the file
sorted-lengths.txt. After these commands, select the answer that corresponds to the filesorted-lengths-subset.txt:$ head -n 3 sorted-lengths.txt > sorted-lengths-subset.txt $ tail -n 2 sorted-lengths.txt >> sorted-lengths-subset.txt
- The first three lines of
sorted-lengths.txt- The last two lines of
sorted-lengths.txt- The first three lines and the last two lines of
sorted-lengths.txt- The second and third lines of
sorted-lengths.txtSolution
Option 3 is correct. For option 1 to be correct we would only run the
headcommand. For option 2 to be correct we would only run thetailcommand. For option 4 to be correct we would have to pipe the output ofheadintotail -n 2by doinghead -n 3 sorted-lengths.txt | tail -n 2 > sorted-lengths-subset.txt
Passing output to another command
In our example of finding a file with the fewest lines,
we are using two intermediate files lengths.txt and sorted-lengths.txt to store output.
This is a confusing way to work because
even once you understand what wc, sort, and head do,
those intermediate files make it hard to follow what’s going on.
We can make it easier to understand by running sort and head together:
$ sort -g lengths.txt | head -n 1
1 python.txt
The vertical bar, |, between the two commands is called a pipe.
It tells the shell that we want to use
the output of the command on the left
as the input to the command on the right.
This has removed the need for the sorted-lengths.txt file.
Combining multiple commands
Nothing prevents us from chaining pipes consecutively.
We can for example send the output of wc directly to sort,
and then the resulting output to head.
This removes the need for any intermediate files.
In fact, let’s delete the files we created, containing lengths of other files:
$ rm lengths.txt sorted-lengths.txt sorted-lengths-subset.txt
Now we’ll start by using a pipe to send the output of wc to sort:
$ wc -l *.txt | sort -g
    1 python.txt
    3 bowerbird.txt
    4 wildcat.txt
   11 dunnock.txt
   18 shark.txt
   20 toad.txt
   57 total
We can then send that output through another pipe, to head, so that the full pipeline becomes:
$ wc -l *.txt | sort -g | head -n 1
1 python.txt
This is exactly like a mathematician nesting functions like log(3x)
and saying ‘the log of three times x’.
In our case,
the calculation is ‘head of sort of line count of *.txt’.
Redirection and pipes, as used in the last few commands, are illustrated below:

Piping Commands Together
In our current directory, we want to find the 3 files which have the least number of lines. Which command listed below would work?
wc -l * > sort -g > head -n 3wc -l * | sort -g | head -n 1-3wc -l * | head -n 3 | sort -gwc -l * | sort -g | head -n 3Solution
Option 4 is the solution. The pipe character
|is used to connect the output from one command to the input of another.>is used to redirect standard output to a file. Try it in theshell-lesson-data/exercise-data/populationsdirectory!
Tools designed to work together
This idea of linking programs together is why Unix has been so successful.
Instead of creating enormous programs that try to do many different things,
Unix programmers focus on creating lots of simple tools that each do one job well,
and that work well with each other.
This programming model is called ‘pipes and filters’.
We’ve already seen pipes;
a filter is a program like wc or sort
that transforms a stream of input into a stream of output.
Almost all of the standard Unix tools can work this way:
unless told to do otherwise,
they read from standard input,
do something with what they’ve read,
and write to standard output.
The key is that any program that reads lines of text from standard input and writes lines of text to standard output can be combined with every other program that behaves this way as well. You can and should write your programs this way so that you and other people can put those programs into pipes to multiply their power.
Pipe Reading Comprehension
A file called
six-species.csv(in theshell-lesson-data/exercise-data/populationsfolder) contains the combined data for the six species. Take a look at the file usingcat. There is a lot of information. Lines have been wrapped to fit, and the top of the output scrolls off the top of the terminal. Now look at the first line only, usinghead -n 1 six-species.csv. This gives column headings. Confirm that the first heading is “ID”. This gives the LPD database ID for the population time series, an arbitrary number which uniquely identifies the time series. (The final column headings, from 1950 to 2020, give the date.)What text passes through each of the pipes and the final redirect in the pipeline below? Note, the
sort -rcommand sorts in reverse order.$ cat six-species.csv | head -n 5 | tail -n 3 | sort -g -r > final.txtHint: build the pipeline up one command at a time to test your understanding
Solution
The
headcommand extracts the first 5 lines fromsix-species.csv. Then, the last 3 lines are extracted from the previous 5 by using thetailcommand. With thesort -g -rcommand those 3 lines are sorted in reverse numerical order and finally, the output is redirected to a filefinal.txt. The content of this file can be checked by executingcat final.txt. The file should contain three long lines, the first beginning with 2826, the second beginning with 2825 and the third beginning with 2824. I.e. the three population time series extracted byheadandtailhave been sorted in reverse numerical order of their IDs in the Living Planet Database (LPD).
Pipe Construction
For the file
six-species.csvfrom the previous exercise, consider the following command:$ cut -d , -f 2 six-species.csvThe
cutcommand is used to remove or ‘cut out’ certain sections of each line in the file, andcutexpects the lines to be separated into columns by a Tab character. A character used in this way is a called a delimiter. In the example above we use the-doption to specify the comma as our delimiter character. We have also used the-foption to specify that we want to extract the second field (column). This gives the following output:Binomial Prunella_modularis Prunella_modularis Prunella_modularis Prunella_modularis Prunella_modularis Prunella_modularis Prunella_modularis Prunella_modularis Prunella_modularis Prunella_modularis Prunella_modularis Bufo_bufo Bufo_bufo Bufo_bufo Bufo_bufo Bufo_bufo Bufo_bufo Bufo_bufo Bufo_bufo Bufo_bufo Bufo_bufo Bufo_bufo Bufo_bufo Bufo_bufo Bufo_bufo Bufo_bufo Bufo_bufo Bufo_bufo Bufo_bufo Bufo_bufo Bufo_bufo Ailuroedus_melanotis Ailuroedus_melanotis Ailuroedus_melanotis Carcharodon_carcharias Carcharodon_carcharias Carcharodon_carcharias Carcharodon_carcharias Carcharodon_carcharias Carcharodon_carcharias Carcharodon_carcharias Carcharodon_carcharias Carcharodon_carcharias Carcharodon_carcharias Carcharodon_carcharias Carcharodon_carcharias Carcharodon_carcharias Carcharodon_carcharias Carcharodon_carcharias Carcharodon_carcharias Carcharodon_carcharias Carcharodon_carcharias Python_regius Felis_silvestris Felis_silvestris Felis_silvestris Felis_silvestrisThe first line contains the column heading, “Binomial”. The rows then give the binomial name of the exact species, for example Prunella modularis (the dunnock).
The
uniqcommand filters out adjacent matching lines in a file. How could you extend this pipeline (usinguniqand another command) to find out which species the file contains (without any duplicates in their names)?Solution
$ cut -d , -f 2 six-species.csv | sort | uniq
Which Pipe?
The
uniqcommand has a-coption which gives a count of the number of times a line occurs in its input. Assuming your current directory isshell-lesson-data/exercise-data/populations, which of the following commands would be best to produce a table that shows the total count of each type of animal in the file?
sort six-species.csv | uniq -csort -t , -k2,2 six-species.csv | uniq -ccut -d , -f 2 six-species.csv | uniq -ccut -d , -f 2 six-species.csv | sort | uniq -ccut -d , -f 2 six-species.csv | sort | uniq -c | wc -lSolution
Option 4. is the correct answer. (Note, it could be improved further — its output also includes an entry for the column heading, “Binomial”). If you have difficulty understanding why this is the best, try running the commands, or sub-sections of the pipelines (make sure you are in the
shell-lesson-data/exercise-data/populationsdirectory).
Removing Unneeded Files
Suppose you want to delete your processed data files, and only keep your raw files and processing script to save storage. The raw files end in
.datand the processed files end in.txt. Which of the following would remove all the processed data files, and only the processed data files?
rm ?.txtrm *.txtrm * .txtrm *.*Solution
- This would remove
.txtfiles with one-character names- This is the correct answer
- The shell would expand
*to match everything in the current directory, so the command would try to remove all matched files and an additional file called.txt- The shell would expand
*.*to match all files with any extension, so this command would delete all files
Key Points
wccounts lines, words, and characters in its inputs.
catdisplays the contents of its inputs.
sortsorts its inputs.
headdisplays the first 10 lines of its input.
taildisplays the last 10 lines of its input.
command > [file]redirects a command’s output to a file (overwriting any existing content).
command >> [file]appends a command’s output to a file.
[first] | [second]is a pipeline: the output of the first command is used as the input to the second.The best way to use the shell is to use pipes to combine simple single-purpose programs (filters).